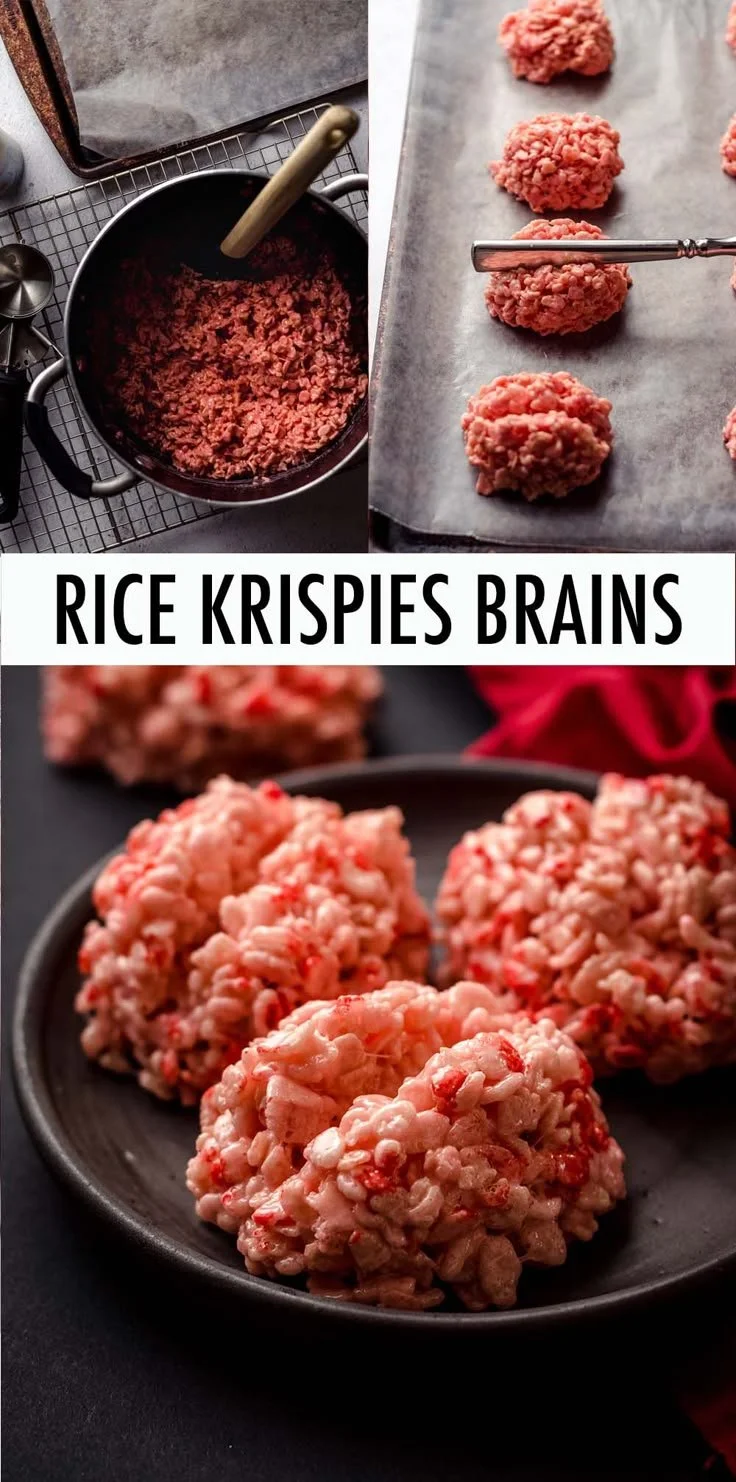
Halloween is the perfect time to get creative in the kitchen, and these spooky Rice Krispie Brains are a fun and festive treat that will delight guests of all ages. Not only are they easy to make, but they also bring a dash of whimsy to any Halloween gathering. With simple ingredients and a touch of creativity, you can whip up these delightful treats that are sure to become a seasonal favorite.
Why You’ll Love Rice Krispie Brains
- Easy to Make: With just a handful of ingredients and simple steps, even beginner cooks can master this recipe.
- Fun Presentation: These brain-shaped treats are not just delicious; they’re visually striking, adding a fun twist to your Halloween dessert table.
- Customizable Decoration: You can get creative with the fake blood drizzle, making each batch unique to your personal style.
- Great for Parties: These treats are perfect for Halloween parties, school events, or simply as a fun family project.
- Kid-Friendly: Kids can help with mixing and decorating, making it a great recipe for a family activity.
Recipe Overview
- Prep Time: 15 minutes
- Cook Time: 5 minutes
- Total Time: 20 minutes
- Servings: 10-12
- Difficulty Level: Easy
Ingredients You’ll Need for Rice Krispie Brains
- 6 cups Rice Krispies cereal
- 3 tablespoons butter
- 1 package (10 oz) marshmallows
- Red food coloring
- Corn syrup or strawberry jelly (for fake blood)
Notes:
- Use the Rice Krispies cereal as the base for these treats; ensure they are fresh for the best texture.
- Marshmallows help create that classic gooeyness. You can use mini marshmallows or regular ones based on what you have.
- For a colored fake blood effect, both corn syrup or strawberry jelly work well, adding sweetness and a fun visual touch.
How to Make Rice Krispie Brains
-
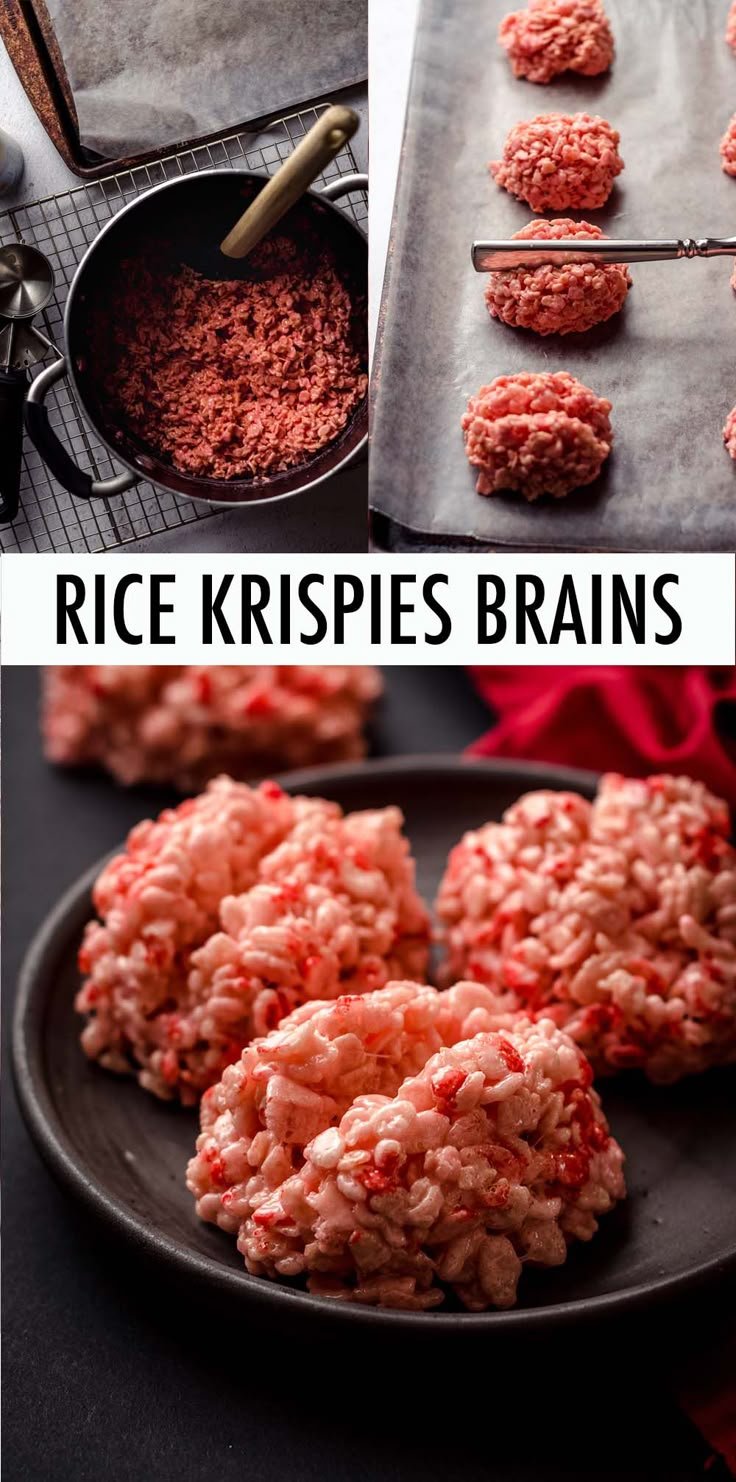
Melt the Butter and Marshmallows: In a large saucepan, melt the butter over low heat. Once melted, add the marshmallows and stir continuously until they are completely melted and smooth.
-
Combine with Cereal: Remove the saucepan from heat and add the Rice Krispies cereal. Stir gently but thoroughly until all the cereal is well coated in the marshmallow mixture.
-
Shape the Treats: Grease a brain-shaped mold (or another fun shape) with a little extra butter or cooking spray. Using a spatula or your hands, press the mixture firmly into the mold. Allow it to cool completely, which might take about 30 minutes.
-
Prepare the Fake Blood: In a separate mixing bowl, combine corn syrup or jelly with red food coloring. Stir until you reach your desired shade of red.
-
Decorate: When the Rice Krispie treats have cooled and set, carefully remove them from the mold. Drizzle or smear the fake blood mixture on top to create a spooky effect.
-
Serve and Enjoy: These Rice Krispie brains are now ready to impress your guests! They’re best served at room temperature.
Tips for Success
- Be Gentle When Mixing: When adding the Rice Krispies to the melted marshmallow, stir gently to avoid crushing the cereal, which could make the treats dense.
- Use Fresh Ingredients: Ensure that your marshmallows and Rice Krispies are fresh for the best texture and flavor. Stale ingredients will result in a less enjoyable treat.
- Cool Completely in the Mold: Letting the treats cool fully in the mold ensures they hold their shape when removed.
- Adjust Blood Color: Start with a small amount of food coloring and add more as needed to avoid oversaturating the mixture.
Easy Variations
- Chocolate Drizzle: Melt some chocolate and drizzle it over the brains for an added layer of flavor and an eerie effect.
- Sprinkles: Incorporate seasonal sprinkles into the mixture before shaping or sprinkle them on top of the blood for extra color texture.
- Add Flavors: Try adding a teaspoon of vanilla extract to the marshmallow mixture for extra flavor.
- Vegan Option: Substitute the butter with a plant-based alternative and use vegan marshmallows.
What to Serve with Rice Krispie Brains
- Mini Pumpkin Cupcakes: These add a festive touch and are a sweet counterpart to the salty, sweet flavor of the Rice Krispie treats.
- Apple Slices with Caramel Dip: A classic combination that pairs well, providing a refreshing crunch next to the soft treats.
- Ghostly Meringue Cookies: Light and airy, these cookies add a different texture to your Halloween spreads.
- Popped Corn: Serve popcorn flavored with spices as a savory complement.
Storage and Reheating
- Refrigeration: Store leftover Rice Krispie brains in an airtight container at room temperature for up to three days.
- Freezing: You can freeze these treats by wrapping them tightly in plastic wrap and placing them in a freezer-safe container. They can last up to 2 months.
- Thawing: When ready to enjoy, let them thaw at room temperature. Avoid reheating as it can change the texture.
Common Mistakes to Avoid
- Overheating the Marshmallows: Keep the heat low to prevent the marshmallows from burning and affecting the flavor.
- Not Pressing Firmly into the Mold: Make sure to pack the mixture tightly; otherwise, your treats may crumble when removed.
- Using Too Much Blood: Less can be more when it comes to the fake blood. Start with a little and add more as you see fit.
Rice Krispie Brains: Background & Cultural Inspiration
Rice Krispie treats date back to the 1930s when they were first featured in a recipe booklet by the Kellogg Company. These simple, no-bake treats quickly became popular, morphing into various forms around holidays and celebrations. The brain shape, especially during Halloween, adds a creative twist that plays into the spooky spirit of the holiday and has become a go-to for Halloween parties. The addition of "blood" with food coloring connects traditional Halloween themes of trick-or-treating with fun culinary creativity.
Frequently Asked Questions
Can I Make These Rice Krispie Brains Ahead of Time?
Yes! You can make them a day or two in advance. Just store them properly to maintain their texture.
What Can I Substitute for the Corn Syrup?
You can use strawberry jelly or even a thick berry jam for a fruity twist that adds flavor as well as a spooky look.
How Can I Keep These Treats Fresh?
Keeping them in an airtight container will help maintain their freshness. Avoid refrigeration as it can make them hard.
Can I Use Different Cereal?
While Rice Krispies are traditional, you could use other puffed cereals, although the texture may vary slightly.
How Should I Store Leftover Treats?
Store them at room temperature in a sealed container. If they become hard, they can be briefly warmed in the microwave.
Final Thoughts
These Rice Krispie Brains are a delightful way to celebrate Halloween with friends and family. They’re simple to make, easy to customize, and will surely be a conversation starter at any gathering. Whether you’re hosting a spooky soirée or just looking to add some fun to the holiday, this recipe is worth trying. Get ready for the compliments and the fun that come with your festive creation!
PrintRice Krispie Brains

Spooky Rice Krispie Brains are a fun and festive treat perfect for Halloween gatherings, easy to make and customizable.
- Prep Time: 15 minutes
- Cook Time: 5 minutes
- Total Time: 20 minutes
- Yield: 10-12 servings
- Category: Dessert
- Method: No-Bake
- Cuisine: American
- Diet: Vegetarian
Ingredients
- 6 cups Rice Krispies cereal
- 3 tablespoons butter
- 1 package (10 oz) marshmallows
- Red food coloring
- Corn syrup or strawberry jelly (for fake blood)
Instructions
- Melt the butter and marshmallows in a saucepan over low heat, stirring until smooth.
- Remove from heat and gently mix in the Rice Krispies until well coated.
- Grease a brain-shaped mold and press the mixture into it, allowing to cool completely.
- Combine corn syrup or jelly with red food coloring in a bowl to create the fake blood.
- Carefully remove the treats from the mold and drizzle the fake blood on top.
- Serve and enjoy at room temperature.
Notes
Use fresh ingredients for the best texture and flavor. You can substitute butter with a plant-based alternative for a vegan option.