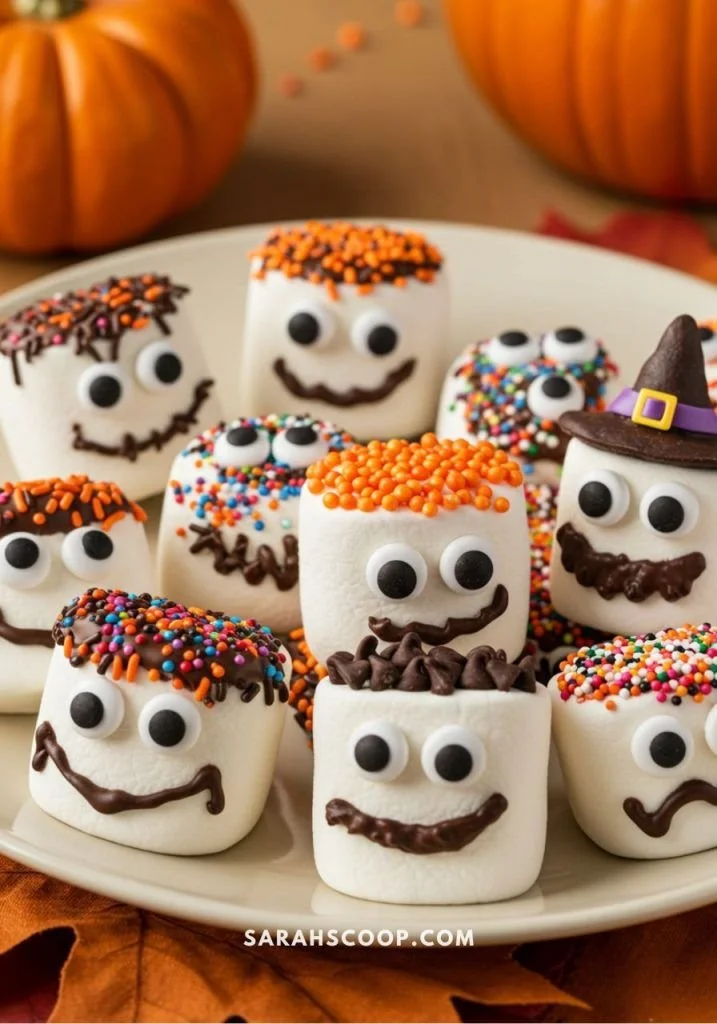
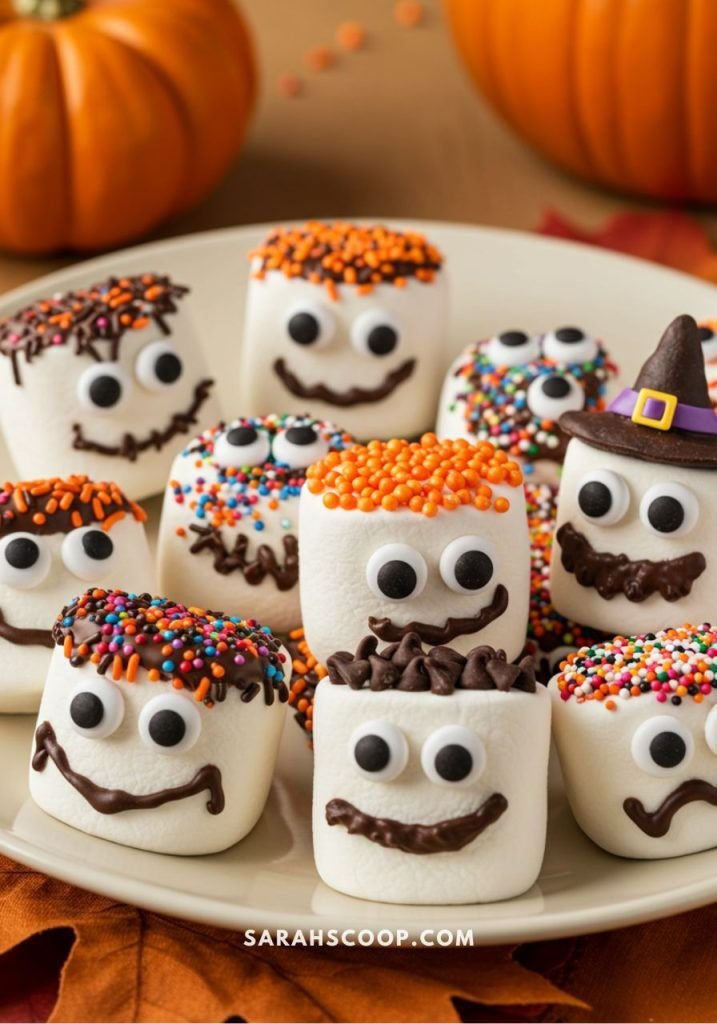
Creating fun and playful snacks can make any gathering feel special. This Fun DIY Marshmallow Monster Faces Recipe is a delightful way to get creative in the kitchen while making tasty treats that both kids and adults will love. With easy steps and simple ingredients, this recipe is perfect for kids’ parties, Halloween, or just a fun evening at home!
Why You’ll Love Fun DIY Marshmallow Monster Faces
- Endless Creativity: Use various decorations to create unique monster faces. Each person can design their own, making them fun for everyone.
- Quick to Prepare: This recipe takes only about 30 minutes from start to finish, making it ideal for last-minute gatherings.
- Kid-Friendly: Kids can participate in the decorating process, which adds an interactive element to your snack preparation.
- Simple Ingredients: You only need a handful of ingredients, many of which you may already have at home, making this a budget-friendly choice.
- Perfect for Occasions: These marshmallow monster faces suit any celebration, from Halloween to birthday parties, or even just a crafting day.
Recipe Overview
- Prep Time: 15 minutes
- Cook Time: 15 minutes
- Total Time: 30 minutes
- Servings: 12 monster faces
- Difficulty Level: Easy
Ingredients You’ll Need for Fun DIY Marshmallow Monster Faces
- 12 large marshmallows: The base for your monster faces. Choose fresh marshmallows for the best texture.
- 1 cup chocolate melting wafers: These will be melted to dip the marshmallows. You can finding them in various colors for added fun.
- Candy eyes: These are crucial for giving your monsters their personality. Available in various sizes.
- Sprinkles: Use colorful sprinkles to add a festive touch. Try different shapes and colors for variety.
- 12 lollipop sticks: These serve as handles for your marshmallow monsters, making them easy to hold and eat.
here
How to Make Fun DIY Marshmallow Monster Faces
-
Melt the Chocolate
Follow the package instructions to melt the chocolate wafers in a microwave-safe bowl, stirring every 30 seconds until smooth. Aim for a velvety texture without lumps. -
Prepare the Lollipop Sticks
Dip one end of each lollipop stick into the melted chocolate. This helps secure the marshmallow to the stick. -
Insert Marshmallows
Push the chocolate-dipped end of the lollipop stick into the center of each marshmallow. Make sure it goes in deep enough to hold the marshmallow steady. -
Coat with Chocolate
Dip each marshmallow into the melted chocolate to fully coat it. Gently shake off any excess chocolate for a clean finish. -
Decorate Before Setting
While the chocolate is still wet, quickly add candy eyes and sprinkles to create your fun monster faces. Get creative with the placement! -
Let Set
Place the decorated marshmallows on a baking sheet lined with parchment paper. Allow the chocolate to set completely at room temperature (or refrigerate for quicker results).
Tips for Success
- Use Quality Chocolate: Good quality melting wafers or chocolate will melt better and taste better in the end.
- Don’t Rush the Melt: Stirring frequently while melting prevents burning. Keep an eye on the chocolate.
- Add More Flavor: For an extra taste kick, consider adding a sprinkle of sea salt on top of the chocolate before it sets.
- Experiment with Colors: Using colored chocolate melts can add a visual element and enhance the fun.
Easy Variations
- Different Marshmallow Sizes: Use mini marshmallows for bite-sized treats or jumbo marshmallows for a larger, more impressive design.
- Alternate Coatings: Dip marshmallows in white chocolate or colored candy melts for a different look and flavor.
- Fruit Add-ins: Stick on pieces of fruit like gummy worms or fruit slices to create monsters with more “accessories.”
- Themed Decorations: Use Halloween-themed sprinkles or edible glitter for seasonal festivities.
What to Serve with Fun DIY Marshmallow Monster Faces
- Hot Chocolate: Pair these marshmallow treats with a warm cup of hot chocolate for a cozy snack.
- Fruit Platter: Fresh fruit complements the sweetness of the marshmallows and adds a healthy option.
- Popcorn: Savory popcorn can balance the sweetness, making it a great snack combo.
- Cookies: Pair with sugar cookies or chocolate chip cookies for a fun dessert table.
- Cupcakes: Sweet cupcakes can enhance your dessert spread at any gathering.
Storage and Reheating
- Refrigerator Storage: Store leftover marshmallow monster faces in an airtight container in the refrigerator for 3-5 days.
- Freezer Storage: While not ideal due to texture changes, you can freeze the marshmallows for up to a month. Thaw in the refrigerator when ready to serve.
- Best Reheating Method: There’s no need to reheat; enjoy cold or at room temperature. Avoid heating, as it can cause the chocolate to lose its texture.
Common Mistakes to Avoid
- Skipping the Setting Time: Allow them to fully set before serving; otherwise, chocolate may smear.
- Not Measuring Ingredients: Use exact amounts for a consistent texture and flavor.
- Overheating Chocolate: Be careful when melting chocolate; overheating can lead to lumps and a gritty texture.
- Ignoring the Details: Spend time on decorations; rushing the decorating step might result in less appealing designs.
Fun DIY Marshmallow Monster Faces: Background & Cultural Inspiration
Marshmallows have been enjoyed for centuries, originating from the Egyptian times when they were made from the sap of the mallow plant. The modern version is much simpler to create and allows for endless creativity. This recipe takes advantage of this classic treat, transforming it into playful art. Inspired by children’s imagination and seasonal festivities, these monster faces are perfect for engaging kids while allowing them to express their creativity.
Frequently Asked Questions
How can I store leftover marshmallow monsters?
Store them in an airtight container in the fridge for up to five days or freeze them for longer storage.
Can I make these ahead of time?
Yes! These marshmallow treats can be made up to a day in advance. Just be sure to store them properly to maintain freshness.
What can I substitute for candy eyes?
You can use small chocolate chips, M&M’s, or even cut marshmallows to make your own eyes if candy eyes aren’t available.
Are these suitable for a party?
Absolutely! They are visually appealing and can be made in large batches, making them great snacks for parties.
How can I make these dairy-free?
Use dairy-free chocolate melting wafers and check that your marshmallows are vegan, as some brands contain gelatin derived from animal products.
Final Thoughts
This Fun DIY Marshmallow Monster Faces Recipe is not just a treat; it’s an experience. Engaging in the creativity of crafting these colorful, whimsical faces can bring joy to any gathering or special occasion. Easy to make and fun to personalize, these monster treats are definitely worth trying. Dive in and enjoy the laughter and creativity they bring!
PrintFun DIY Marshmallow Monster Faces

Create fun and playful marshmallow monster faces that are perfect for parties and gatherings, involving kids in a delightful crafting experience.
- Prep Time: 15 minutes
- Cook Time: 15 minutes
- Total Time: 30 minutes
- Yield: 12 monster faces
- Category: Snack
- Method: No-Bake
- Cuisine: American
- Diet: Vegetarian
Ingredients
- 12 large marshmallows
- 1 cup chocolate melting wafers
- Candy eyes
- Sprinkles
- 12 lollipop sticks
Instructions
- Melt the chocolate wafers following the package instructions in a microwave-safe bowl, stirring every 30 seconds until smooth.
- Prepare the lollipop sticks by dipping one end into the melted chocolate to secure the marshmallow.
- Insert the chocolate-dipped end of the lollipop stick into each marshmallow.
- Coat each marshmallow in the melted chocolate, shaking off excess for a clean look.
- Decorate the wet chocolate with candy eyes and sprinkles to create your monster faces.
- Let the decorated marshmallows set on a baking sheet lined with parchment paper at room temperature.
Notes
Using quality chocolate and allowing the decorated marshmallows to cool properly will improve both taste and appearance. Experiment with colors and design!