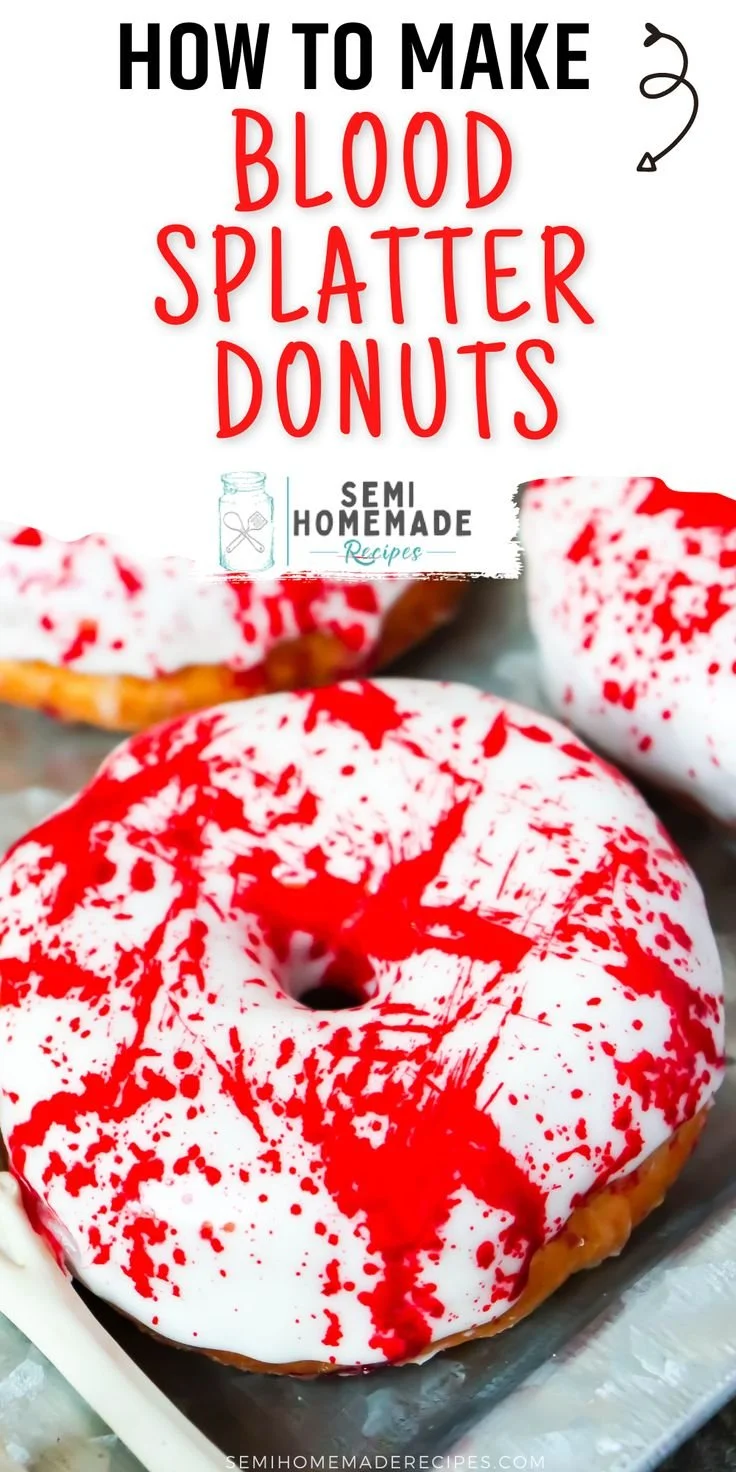
Making Blood Splatter Donuts is a fun and delightful way to add a touch of whimsy to your dessert table. These glazed donuts, adorned with a vibrant red splatter, are perfect for Halloween parties or any occasion where you want to impress with a creative treat. Not only do they look striking, but they also offer a deliciously sweet experience that everyone will love.
Why You’ll Love Blood Splatter Donuts
- Fun Aesthetic: These donuts are not just tasty; their unique appearance makes them a conversation starter at any gathering.
- Easy to Make: With simple ingredients and straightforward steps, you can whip these up even if you’re a beginner.
- Customizable: You can adjust the splatter effect to your liking, making each batch uniquely yours.
- Perfect for Any Occasion: Whether it’s Halloween, a birthday party, or just a fun family treat, these donuts fit right in.
- Deliciously Sweet: The glaze adds a perfect level of sweetness that will satisfy any sugar craving.
Recipe Overview
- Prep Time: 15 minutes
- Cook Time: 10 minutes
- Total Time: 25 minutes
- Servings: 12 donuts
- Difficulty Level: Easy
Ingredients You’ll Need for Blood Splatter Donuts
-
For the Donuts:
- 12 glazed donuts (store-bought or homemade)
-
For the Glaze:
- 2 cups powdered sugar
- 1/2 cup heavy cream or milk
-
For the Splatter Effect:
- Red liquid food coloring
Helpful Notes:
- For best results, use fresh donuts that have a light and fluffy texture.
- Heavy cream will create a richer glaze, but milk can be used for a lighter option.
- Adjust the amount of food coloring based on how bold you want the splatter effect to be.
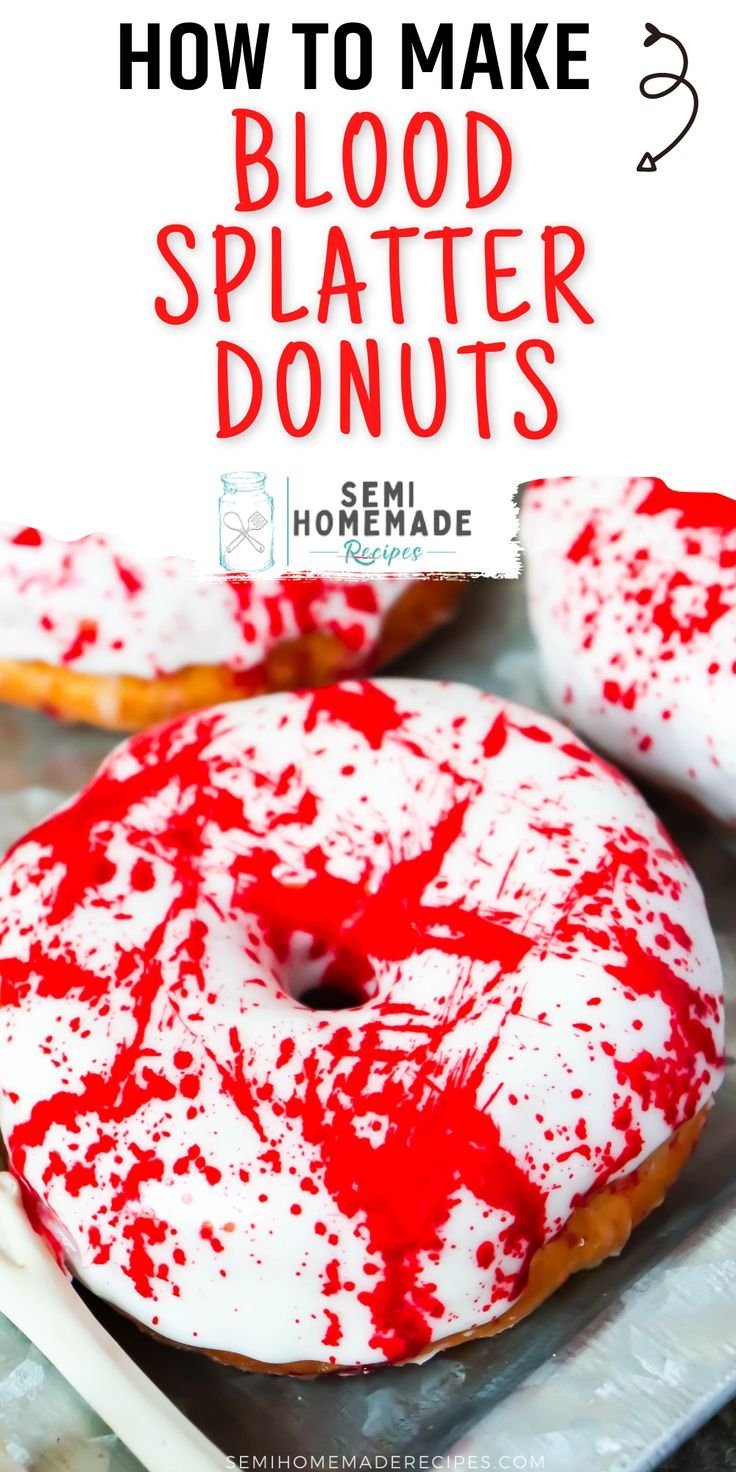
How to Make Blood Splatter Donuts
-
Prepare the Glaze
In a medium-sized bowl, combine the powdered sugar and half of the milk. Stir until smooth. -
Adjust Consistency
Gradually add more milk, a little at a time, until the glaze reaches a dippable consistency. It should be thick yet fluid enough to coat the donuts. -
Dip the Donuts
Take each donut and dip the top into the glaze, allowing any excess to drip off. Place the dipped donuts on a wire rack. -
Create the Splatter Effect
In a separate small bowl, pour some red liquid food coloring. Using a spoon or your fingers, flick red food coloring over the glazed donuts to create a splattered effect. Adjust the amount for a more pronounced look. -
Let Them Set
Allow the donuts to sit for a few minutes so the glaze can set before serving.
Tips for Success
- Don’t Overmix the Glaze: Stir just until combined; overmixing can cause air bubbles.
- Temperature Matters: Ensure the donuts are at room temperature before dipping; this helps the glaze adhere better.
- Use Quality Ingredients: Better quality powdered sugar and cream can elevate the taste of the glaze.
- Control the Splatter: Practice flicking with a spoon on a paper towel to test how the color disperses before hitting the donuts.
- Storage: Keep the donuts in an airtight container to maintain their freshness.
Easy Variations
- Chocolate Glaze: Replace half the powdered sugar with cocoa powder to create a chocolate glaze.
- Different Colors: Use different food colorings to create a variety of splatter effects for themed parties.
- Stuffed Donuts: Fill the donuts with jelly or cream before glazing for added flavor.
- Spiced Glaze: Add a pinch of cinnamon or nutmeg to the glaze for a seasonal twist.
- Dairy-Free Option: Substitute heavy cream with a dairy-free alternative, like almond milk, for a vegan-friendly version.
What to Serve with Blood Splatter Donuts
- Coffee: The rich flavors of coffee pair wonderfully with sweet donuts.
- Milkshake: A chocolate or vanilla milkshake complements the sweetness of the donuts perfectly.
- Fruit Salad: A fresh fruit salad helps balance the sweetness with refreshing flavors.
- Hot Chocolate: The creamy warmth of hot chocolate is excellent for chilly days and pairs well with these treats.
- Ice Cream: Serve with vanilla or red velvet ice cream for a delicious dessert combination.
Storage and Reheating
- Refrigerator Storage: Keep in an airtight container in the refrigerator for up to 3 days.
- Freezer Storage: If you need to store them longer, freeze unglazed donuts for up to a month. Thaw before glazing.
- Reheating: Warm in the microwave for about 10 seconds to regain some freshness before serving.
- Preserve Texture: Avoid stacking the donuts in storage to keep them from sticking together.
Common Mistakes to Avoid
- Thin Glaze: If your glaze is too thin, it won’t coat the donuts properly. Make sure it’s thick before dipping.
- Skipping the Cooling Rack: Don’t skip placing glazed donuts on a wire rack; this prevents sogginess as the glaze sets.
- Over-splattering: While it’s fun to create the splatter effect, too much can overwhelm the appearance and flavor of the donuts.
- Not Testing the Food Coloring: Test your food coloring on a plate first to see how it splatters before applying to the donuts.
- Storing While Still Warm: Let the donuts cool completely before storing to avoid excess moisture.
Blood Splatter Donuts: Background & Cultural Inspiration
Blood Splatter Donuts are reminiscent of playful culinary creativity often seen around Halloween. The visual style harks back to traditional festive foods that add a bit of fun and spookiness to gatherings. Inspired by classic glazed donuts, this variation seeks to bring a unique twist, fitting for themed parties and casual get-togethers. The whimsical presentation and delightful flavors can turn an ordinary dessert into a standout dish, celebrating seasonal festivities in an enjoyable way.
Frequently Asked Questions
Can I use store-bought donuts?
Yes, store-bought donuts work great for this recipe and save time!
How can I make the glaze thicker?
Add more powdered sugar gradually until you reach your desired thickness.
Can I prepare the donuts in advance?
You can prepare the donuts a day in advance. However, glaze them closer to serving for the best texture.
What kind of food coloring works best?
Liquid food coloring is ideal for splattering; gel food coloring may be too thick for the effect.
How do I prevent the glaze from dripping too much?
Allow excess glaze to drain off the donut completely before placing it on the wire rack.
Final Thoughts
Blood Splatter Donuts are not only visually striking but also easy and fun to make. They’re a great way to bring creativity into the kitchen, and they taste just as delightful as they look. Whether for a festive gathering or a cozy treat at home, these donuts are sure to impress. Give them a try, and enjoy the delightful experience of baking something both spooky and delicious!
PrintBlood Splatter Donuts

Fun and whimsical Blood Splatter Donuts that add a creative touch to any dessert table, perfect for Halloween or festive gatherings.
- Prep Time: 15 minutes
- Cook Time: 10 minutes
- Total Time: 25 minutes
- Yield: 12 servings
- Category: Dessert
- Method: Baking
- Cuisine: American
- Diet: Vegetarian
Ingredients
- 12 glazed donuts (store-bought or homemade)
- 2 cups powdered sugar
- 1/2 cup heavy cream or milk
- Red liquid food coloring
Instructions
- Prepare the glaze: In a medium-sized bowl, combine the powdered sugar and half of the milk. Stir until smooth.
- Adjust consistency: Gradually add more milk, a little at a time, until the glaze reaches a dippable consistency.
- Dip the donuts: Take each donut and dip the top into the glaze, allowing any excess to drip off.
- Create the splatter effect: In a separate small bowl, pour some red liquid food coloring and flick it over the glazed donuts.
- Let them set: Allow the donuts to sit for a few minutes for the glaze to set before serving.
Notes
For best results, use fresh donuts. Heavy cream creates a richer glaze, but milk is a lighter option. Keep the donuts in an airtight container to maintain freshness.